







Coffee roasting is not an art, it's a craft. And that's why you can also easily roast your own coffee at home. But to make sure it tastes good and isn't too dangerous, we've compiled these tips for you.
Anyone who's ever been to a coffee roastery knows how much space roasting machines can take up. We roast on a 12kg roaster, which weighs a good 500kg and is the size of a small car.
Our 1kg Probatino roaster also weighs well over 100kg, but is still quite large. If you've ever been to a large roastery and seen a 250kg roaster, you'll find that these machines, with all their trimmings, come close to the size of a small house.
But it can also be much smaller. There are devices that are at most the size of a shoebox, with which you can roast 50g or even several hundred grams at home. And it's really fun. You're never quite as close to the product as when you roast coffee on the smallest possible scale.
A small adventure
We've tried various home roasting machines and present them on our YouTube channel. One thing upfront – I had a huge amount of fun. I usually roast on a 12kg roaster and advise other roasteries that have 5kg – 60kg roasters. Those are sizes I'm used to.
But roasting a few grams is somehow very exciting. Many things are trickier, less controllable, faster and – yes – sometimes just more random. The background knowledge I've gained over years on larger roasters is being put to the test here. So if you have contrary experiences with the machines discussed or anything else, please write to us in the comments section.
Roasting coffee yourself is initially a small adventure. It smokes, it crackles, it gets hot, maybe things happen a little out of control, but you'll like your coffee. Even if it's not quite as delicious as from elsewhere, the work that goes into it tastes really good.
With our little guide, we show you how you can roast solid coffee at home right from the start.
Time and temperature – how long and how hot to roast?
First, we have to disappoint you – we can't give you exact information about time and temperature. Not because we don't want to, but because we can't.
Temperature
Just as my grind size is not your grind size, my temperature is not your temperature. I recently roasted on two different roasters on two identical machines. But the temperature was always a bit cooler on roaster A than on roaster B.
This was mainly because roaster A had a different temperature probe drilled into the roaster. One that was thinner and therefore more sensitive. Roaster B had drilled in a thicker and thus more sluggish probe.
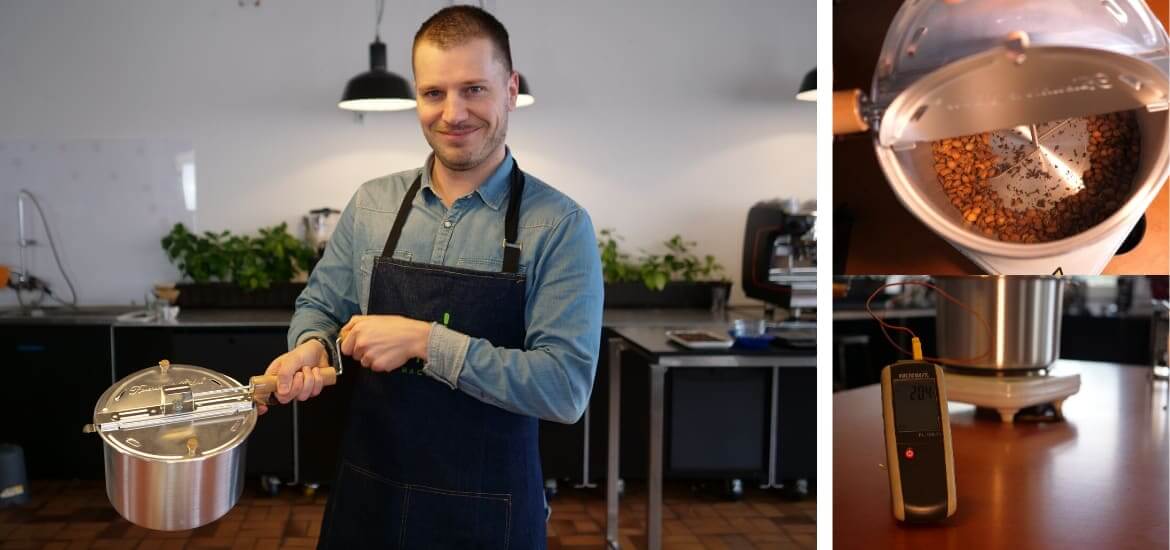
 If we want to measure the temperature in the manual popcorn roaster, we need a temperature probe for it.
So which was the correct temperature? I'd say neither. To be honest, I don't really care which temperature it is "exactly" – the important thing is that we stick to a temperature and continue from there.
The 180° in a popcorn roaster* are probably different 180° in a drum roaster. It always depends on what and where is being measured. That's why temperatures are irrelevant. If you're already roasting at home, you've already gathered experience values and can orient yourself to those. If you're starting from scratch, then we recommend setting the temperature suggested by the manufacturer.
Roasting time
Time and temperature depend on each other during roasting.
The hotter the temperature, the faster the roasting.
The cooler the temperature, the slower the roasting.
Specifying exact times doesn't help much here, as different roasting machines bring heat into the bean differently.
Generally speaking:
4 minutes would probably be too short, the taste would be quite harsh, because the coffee hasn't yet gone through enough sugar conversion.
20 minutes is quite long, especially with very small quantities – we're just baking the coffee and literally hollowing it out in flavor.
Everything in between seems delicious. Shorter roasts for filter coffees and lighter coffees, slightly longer roasts for espresso. That would be universal – time and temperature specifications unfortunately are not.
Advice box: Time and temperature
- we roast the bean from the outside in – and that requires energy
- too little energy = roasting takes a long time = flavor becomes flat
- too much energy = roasting is difficult to control and flavor is unbalanced
- try roasting the same coffee for 8, 10 and 12 minutes, then taste it. That way you'll find your favorite
What is the right amount?
One of the great advantages of roasting is that many steps are simply explainable and logical. This also applies to the question of how much quantity should be put into the roasting drum.
Small quantities heat up faster – large quantities heat up slower.
Makes sense.
Especially with small roasters, popcorn roasters, etc., there is hardly any energy stored in the system (roaster wall, floor, lid, etc.). Most energy input comes from hot air or direct contact heat.
When you put green coffee into the roaster (=roasting system), the system first loses energy. Green coffee at 20° C ambient temperature comes into a hot environment and first absorbs heat.
When you bake lasagna, you preheat the oven, then open the door and put in the cold lasagna, the temperature in the oven drops first. The same thing happens when roasting.
So if you put a large amount into any roaster, the roasting takes longer because you're removing energy from the system.
If you add a small amount of coffee to the roasting, you remove less energy from the system and you can roast faster.
Is there a right amount of coffee?
You already know the answer – no, there isn't. Everything is system-dependent. By all means, follow the instructions the manufacturer provides. Then you see how long the roasting takes and orient yourself to the points mentioned above.
If you make adjustments to the batch size, then make them definitely noticeable. If you roast the 1st batch with 100g and the 2nd batch with 110g, the difference is much smaller than if you roast, for example, 100g and 150g.
When I come across a new roasting machine during roasting consultations, I always do some more extreme tests, exploring the strengths and weaknesses of the system by choosing larger differences in batches or temperature. That way you get to the goal faster.
Advice box: Amount
- start with the raw coffee amount specified by the manufacturer
- then change the amount with at least 25% difference
- orient yourself to the times mentioned above – if roasting is finished after 4 minutes, the roaster is either much too hot, or the amount is much too small
- if roasting is still not finished after 20 minutes, then reduce the raw coffee amount or turn up the temperature
The first crack and the development time
Over several minutes you approach the first crack, the first pop, or simply the crackling. Then, when the pressure inside the coffee bean is so great that it has to escape, you hear a distinctly quieter or louder crackling depending on your roasting system.
Softer coffees tend to crack like when you crush peanuts. We often hear this cracking sound with Brazilian coffees.
With harder, denser coffees, like those from Kenya, the crackling is much louder and more explosive as if fireworks were going off.
It's fun to hear this crackling and assign it to the coffees. Pay attention to this crackling and you'll understand your coffees much better.
When does the 1st crack begin?
Did I already mention that it's really fun to listen for the 1st crack? Depending on the taste you're aiming for, your crack comes earlier (lighter coffees, because faster roasting), or later (more developed coffees, espresso for example)
The 1st crack comes in increasing intensity, similar to a normal distribution in this image. At first it's just a single bean that starts and cracks (far left in the image). Then a second, a third, and a fourth joins in (first line from left). After that it gets more intense. As soon as you hear the first triplet, that is a rapid succession of crack-crack-crack, that's when we mark the 1st crack (second line from left).
 The crackling (1st crack) resembles a normal distribution
This way we can make sure that now the entire batch starts to crack. It takes some practice, nerves and patience not to mark the 1st crack right away when you hear the first crack.
Shortly after the 1st crack, the entire batch takes off and it cracks more evenly, the majority of the beans (third line from left) now crack simultaneously.
After that the curve drops until no more crackling is heard. If you continue roasting longer and especially hotter at this point, you'll approach the 2nd crack, which is much quieter and more like a crackling sound. For our guide here, we're leaving the 2nd crack out of the picture.
Why is the 1st crack important?
Because it gives us a simple and precise way to roast coffees individually. If I only roast by time, for example all filter coffees for 10, all espressos for 14 and all dark roasts for 18 minutes, then I'm doing the coffee a disservice. Because many coffees behave differently during roasting.
Since we roast many coffees for others, we gather experience with a wide variety of coffees. The more different coffees we roast, the more we can make a prediction about a green coffee unknown to us.
Example:
I take a pulped natural from Brazil and roast it for 10 minutes, as this is my "filter recipe". Then I roast a coffee from Kenya for 10 minutes.
The two coffees behave completely differently and taste that way too. The 10 minutes for the Kenyan coffee might show it in the best light – fruity, balanced, well-integrated acidity, while the coffee from Brazil might already be burnt, as it's much softer.
If we instead get used to marking the 1st crack for each coffee and don't roast by total roasting time, the coffees taste much better pretty quickly.
And what happens after that?
After the 1st crack begins the so-called development time. This is the time the coffee spends from the beginning of the 1st crack until the coffee is removed from the roaster.
An example:
I roast a coffee that cracks after 8 minutes. I mark the 1st crack. Now I roast for another 90 seconds and then remove the coffee from the system. The development time would be 90 seconds, relative to 480 seconds. This way we can calculate the percentage development time, which in this case would be 15.8% (90sec of 570sec).
| Roasting time until 1st crack | Development time | Total roasting time | % Development time |
| 480 seconds | 90 seconds | 570 sec | 90sec/570sec = 15.8% |
And what does that mean now?
A shorter development time of about 5% can mean that I
- under-roast the coffee with pretty good certainty
- create few aromas,
- the coffee still tastes green and unpleasantly nutty to corny
A moderate development time of about 8-10% can mean that I
- get a coffee with lots of aroma,
- more acidity, tea-like texture and
- few roasting notes.
A longer development time of about 12% or more can mean that I
- achieve intense aroma,
- more body and roasting notes
- and a rich sweetness
A long development time of about 18% or more can mean that I
- achieve many roasting notes, fewer light, floral and fruity aromas,
- less acidity, less texture,
- but plenty of body and dark sugar notes
All these specifications are so often "without guarantee" because they depend on the respective roasting system. But I've tried to treat them as generally as possible, so they're more universal than very specific.
Advice box: 1st crack and development time
- the time from 1st crack to the end of roasting, which you determine, we call development time
- if you want to adjust the roasting profile, first change the time after the 1st crack and leave everything before it the same as in the previous roasting
- different coffees have different development times
- always roast with pad, pencil and stopwatch
- mark the 1st crack and stop a round time on your phone, so you have the total roasting time and the development time on one display
The roasting curve
Everything that happens in the system during roasting can now be measured with temperature probes and digitally reproduced via an interface. This so-called roasting log software helps us to roast as precisely and consistently as possible.
In the past – just a few years ago – this software was hardly widespread. Programs like Cropster or Artisan, however, have experienced tremendous growth in recent years. More and more roasteries are not just relying on their intuition, but want to convert their data into information, display it graphically and learn even more.
We read roasting profiles from left to right. The x-axis shows the time, the y-axis on the left shows the bean temperature, the y-axis on the right shows the rate of rise (RoR) – the energy increase per 30 seconds.
 Three roasting curves from the Kaffeemacher roastery
Temperature probes at different locations in the roasting apparatus measure the temperature and record it in software. In the example above, you see three curves from our roastery.
The blue curve is the Ichamama, a lightly roasted filter coffee.
The yellow curve is our Feingeist, a specialty espresso.
The red curve is an extended fully automatic coffee that we roast on behalf of a private label customer.
The roasting language of the three profiles couldn't be more different. In time, the coffees differ between 9:10 and 17:30 minutes. The final temperature is also different in each case. But what becomes very clear is the temperature rise – very steep for the Ichamama, somewhat flatter for the Feingeist, and noticeably slower for the fully automatic coffee.
How you yourself, without elaborate roasting software, can draw such a curve, we'll look at another time. What's important up to this point is to understand that time and temperature differences have a massive impact on the end product.
Wolfram Sorg from Backyard Coffee has written an enlightening article on profile creation: https://www.backyard-coffee.com/blogs/kaffeewissen/entwicklung-eines-kaffees.
Which beans for which taste?
It's probably one of the most beautiful tasks that occur in a roastery: selecting green coffee. At the same time, it's one with many consequences. Depending on your choice of green coffee, you open or limit the range of use for the selected coffee.
 Green coffees differ in density, size and shape. They all roast a bit differently.
High-acid coffees are delicious for filter coffees because we dilute them there with plenty of water to create a light beverage. But these green coffees probably aren't everyone's cup of tea when it comes to espresso.
But vice versa – simpler, tending to nutty-sweet coffees can make a great espresso, though perhaps a somewhat monotonous filter coffee.
Now it's your turn. Because every roasting language is individual. Everyone who roasts has their own interpretation of how the coffee should taste in the end.
Green coffee selection – we open our warehouse
You have to start somewhere, and buying a whole 60kg sack right away is probably not the way to go. So we're now also selling 1.5kg and 3kg bags of green coffee. They're the same ones we use in our range. So if you want, you can re-roast our classic Dreispitz blend, for example.
Which of our coffees do we use for what:
| Filter | Espresso | Taste | Acidity | Texture | Price 1kg | |
| Kenya, Ichamama | yes | not our taste | fruity, berry | lots, juicy | medium-heavy and soft | 16.95CHF |
| Brazil, APAS | possible | but definitely | nutty, chocolatey | little, mild | soft and gentle | 6.40 CHF |
| Nicaragua, Santa Rita, Leica Washed | yes | possible | sweet-sour, citrusy and nutty | medium | round | 13 CHF |
| Ethiopia, Bulga | yes | yes | complex, fruity, intense | medium | lots, tea-like | 16 CHF |
| Rwanda, Simbi | yes | possible | Black tea, honey, oranges | medium | tea-like | 16 CHF |
| India, Faith Estate, Robusta | not our taste | definitely | Wham. Woody, nutty | barely | heavy | 5.90 CHF |
| Honduras, 18 Conejo | yes | possible | Limes, stone fruit, dark chocolate | lots | juicy | 13.65 CHF |
| Peru, NORCAFE | possible | yes | citrusy, balanced | medium | round | 6.80 CHF |
| Henrique, Demeter, Brazil | yes | yes | Chocolate, light acidity, nutty | mild | heavy | 13.65 CHF |
Which coffee suits you best, you already know – if you need a little inspiration, then we have put together a little guide here for you.
After roasting: cooling and storage
We recommend, as standard, roasting with a stopwatch, marking the 1st crack and writing down the data. That way you can create references and compare over and over again.
You determine the end of the roasting. Then, when you've reached your desired development time, you remove the coffee from the roasting system.
After that, it's important to cool the coffee as quickly as possible. Not with water, that's only done with large quantities, but with air. In our academy we use these fans that suck air downward and so
a) pull the smoke away
b) cool the coffee quickly
You can also just take a pasta sieve and cool the coffee in it. Important thing: always keep it in motion and blow to cool the coffee down.
This way we stop the physical and chemical processes of roasting and prevent uncontrolled further roasting.
 The silver skins on the green coffee bean (whitish), adhering, and on the table after roasting. The airflow must remove the silver skins from the system so they don't catch fire.
How long should the coffee outgas after roasting?
For our coffees we recommend:
- at least 7 days for a filter coffee
- at least 14 days for an espresso
However, we generally do a cupping for quality assurance after 24-76 hours. We pour 12g of coffee with 200g of hot water, wait 4 minutes, break the crust and slurp the coffee in.
You can use this as a guideline:
long roasting = long outgassing time
short roasting = short outgassing time
Best to taste the coffees regularly, every day after roasting and discover the differences.
That way you'll quickly find the time that's right for you.
What coffee scientist Chahan Yeretzian says about freshness, we discussed in this video.
How can I improve?
Another fascinating aspect of roasting is this totally analog nature. Unlike a digital camera, where you can simply delete a bad photo, you have to have your analog camera under control, otherwise you've wasted film space. That's roasting.
You put green coffee in the system, roast, done. Once the coffee is roasted, you can't roast it again. You could, but it doesn't make sense. You'd just burn the coffee and that's not fun.
Green in, brown out. If you've done everything right, the result tastes great. If not, well then, try again. Learning by doing, or as a colleague once put it: learning by burning. So there's always some adrenaline involved in roasting, and that's probably why it exerts such a fascination on many people.
Record data in the roasting log
To really understand how you're improving, you have to record your data. By hand, in an Excel spreadsheet, it doesn't matter, as long as you include this data:
- which green coffee
- amount of green coffee
- starting temperature (if possible, otherwise doesn't matter)
- time until 1st crack
- development time
- final temperature (if possible, otherwise doesn't matter)
- weight of roasted coffee
By weighing the roasted coffee at the end of roasting, you determine how much roasting loss there was. Figure on 14-20%, depending on the type of roasting. Especially with simple roasters without temperature displays, it's worth measuring the weight. That way you get a feel for how much material you're roasting away.
We've created a simple roasting log for you, which you can download and fill out as a pdf. The more precisely you fill in the data, the more you can compare the different roastings and improve yourself.
Taste, taste, taste
Now all the numbers might look great, but if the coffee doesn't taste good, even the most beautiful numbers won't help. So challenge yourself and taste every batch, and do it in a standardized way.
How can you proceed?
- always taste after x hours
- this way you compare equally old coffees
- grind 12g of coffee and pour with 200ml water
- approx. 96°C
- use your own water, whether it's hard or soft
- in this case it's about getting a feel for your craft
- best to calibrate it by not changing the basic constants (for now)
- let it steep for 4min, skim off the crust, start slurping after about 8min
- or you have your own ritual, e.g. you brew a French press or filter coffee. That's all fine too, the important thing is that you always do it the same way. Consistency, consistency, consistency.
We are your coaches
If you've now read everything, learned a roasting technique and now want our feedback, just send us a sample of your work. We'll taste it and give you feedback. Our feedback is honest because we want you to improve.
So: roast, practice, roast, and if you want, we're here for you and think through how you can do it all even better.
Tips, tricks, safety
-
Green coffee selection
- we offer most of the green coffees in the Kaffeemacher shop that we roast ourselves
- At Ingo's from Roast Rebels you'll also find green coffees
- also Kafischmitte offers green coffees for sale
-
where to roast?
- if you roast in the apartment, in the house – then definitely under a range hood with an open window
- roasting produces a lot of smoke and the silver skins come off the green coffee, which then possibly swirl around
- always keep the coffee in motion so it doesn't burn
- if you have a terrace, balcony or garage, we also recommend roasting there. For everyone's sake.
-
what devices can you recommend?
- we're still holding back on recommendations because we're also still in test mode
- best to subscribe to our YT channel, where we'll showcase the tested machines
- Ingo from roast rebels sells home roasters in the mid-price segment and tests them for you
- we ourselves don't sell machines, but we have fun testing everything that works
- if you give us tips on what we should check out, then please recommend it in the comments.
- you can find the popcorn pot used here at Amazon*
*We bought the popcorn pot. This is a principle for us with all tests. Because we want to evaluate all devices neutrally and without outside influence. The link is an affiliate link to Amazon. If you order something through the link, it doesn't cost you more – but our machine test fund fills up a little bit.